In this article we share some Tips On Creating Your Own Lightroom Presets.
As Adobe Photoshop Lightroom has become one of the most popular digital imaging applications for photographers, creating Lightroom presets to enhance and customize your images is becoming more and more common.
Presets can be applied to any number of photographs to save time when making enhancements, and they’re great for applying a look or effect that you like on a particular photo.
As many Lightroom enthusiasts know, Adobe’s photo management software ships with almost 200 preset for image correction.
These presets can be used to convert color photos into black and white images, to increase the saturation of colours in an image, or to add vignette effects to your pictures.
Often, however, these presets are not enough and you will need to create your own preset that will save you time on routine tasks.
Lightroom is a very powerful tool for all types of photographers, offering an array of useful tools and effects. One way to take your Lightroom workflow up a notch is by adding your custom presets!
Here are some tips that will help you create the perfect set of presets for your photos.
Table of Contents
1. Find Inspiration For Best Lightroom Presets
The best place to start when creating your own presets is to look at other people’s work. Find a few photographers whose style you admire and set up a folder in Lightroom containing their images.
You can either do this by looking through your computer or searching for their images online.
2. The Editing Process For The Presets For Lightroom
Once you’ve chosen the images that will serve as inspiration, make a virtual copy of each photo. Make sure to set the snapshot in time by going to History and creating a new “snapshot” with the date when you made the edit.
This will ensure that your changes are not permanent, allowing you to easily revert or try out other possibilities.
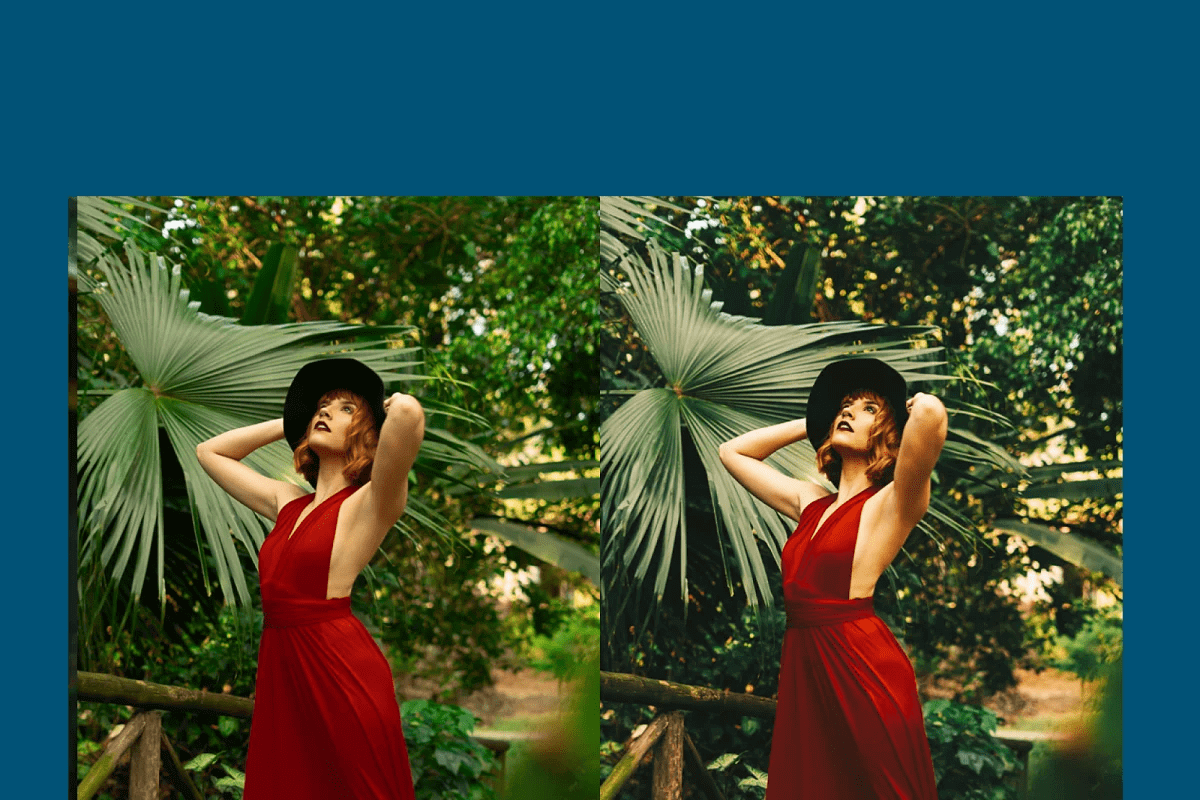
3. Adjusting Brightness And Contrast
Lightroom has four tools for adjusting the brightness and contrast of an image. I use Exposure to set my shadows and Highlights for my highlights. The white slider works great for clipping your whites, while blacks do the same for your blacks.
It’s good practice to use all these sliders when making adjustments to an image, but don’t go overboard!
4. How To Add Presets To Lightroom
Now that all of your images are adjusted to perfection, it’s time to save them as a preset for future use. Go to the Presets tab on the right side of Lightroom and create a new folder.
Create subfolders within this folder for different types of presets, such as “edits”, “actions” or “workflow.”
5. Types Of Free Lightroom Presets
You can make some pretty creative presets by playing around with some of the adjustments you’ve made. I usually alter the contrast, vibrancy, and saturation to create more stylized looks.
It’s also a good idea to sharpen your photos before putting them into Lightroom.
6. How To Use Presets In Lightroom For Texture And Vignetting
Adding a little texture or vignette is an easy way to enhance your photos’ style. There are some great textures on Adobe’s website, as well as actions and presets for Lightroom.
Vignettes can be achieved with the Post Crop Vignetting setting in the Effects tab of Lightroom.
7. Now You’re Ready To Share!
I usually create a preset for every style of edit I do, so that I can easily go back later and apply them to other images with the same look. A good idea would be to add some keywords when saving your presets, such as “Crisp Black and White,” “Bright and Vibrant” or “Light and Airy.”
Creative Market
8. Export For Web
Now that you have a wealth of carefully crafted presets, it’s time to export your images! A great way to do this is by going to the Preset Tab in Lightroom and clicking on the “+” sign next to User Presets.
This is where you’ll be able to choose the size and quality of your exported images.
9. Post Production Is Key!
Choose the right moment, use only what’s needed in the post, don’t over-edit… While these are all great tips for any image, they’re especially important when it comes to presets. Presets should enhance an image, not ruin it.
If you want to use a preset for one of your photos, but you feel like something is off, don’t be afraid to start over and try again!
10. Have Fun!
Finally, the most important part is having fun! The entire idea behind presets is that they can help speed up your editing process. Let your creativity shine through, whether you’re creating presets for friends or clients!
Visit Creative Market for a lot of Lightroom Preset for your Photo Editing. Check it out!
Conclusion
Fortunately, Adobe has made it very easy for users to create their own presets. You can use the menu in Lightroom’s development mode or go to the program’s “edit” menu and press the plus button at the bottom of this menu.
This way, you can create a new preset.
After you have named the preset, it will be added to Lightroom’s menu. To access your presets, later on, press the “preset” button at the bottom of the develop mode window and select their name from this menu.
You can apply presents at any time or group them in different folders under this menu if you like.
Further Reading: 10 Photoshop Tutorials & Ideas for Anything You’re Trying to Accomplish.
Join The Logo Community
We hope you have enjoyed these Tips On Creating Your Own Lightroom Presets. If you would like more personal tips, advice, insights, and access to our community threads and other goodies, join me in our community. You can comment directly on posts and have a discussion.
*TIP – We use and recommend Creative Market for all your unique design assets.
